Step into the world of exquisite bridal footwear, where elegance meets artistry. Your wedding day is a spectacle of details, and your shoes, often glimpsed but always significant, deserve to reflect your unique style. Imagine the breathtaking impact of intricately embroidered bridal shoes, personalized to match your dress or reflect your personality. Forget mass-produced footwear; this tutorial empowers you to create a truly one-of-a-kind masterpiece, transforming ordinary bridal shoes into stunning works of wearable art.
This isn't just about adding a few sequins; we'll delve into the captivating art of bridal shoe embroidery, guiding you through each step of the process. From choosing the perfect materials and preparing your shoes to mastering various embroidery stitches and finishing techniques, we'll ensure you have the knowledge and confidence to create stunning, personalized bridal shoes. Let's begin this exciting journey and discover how to flawlessly embroider your dream wedding shoes, step by step.
Preparation and Safety Guidelines
- Embroidery needles
- DMC embroidery floss
- Finger protectors
- Clothes pegs
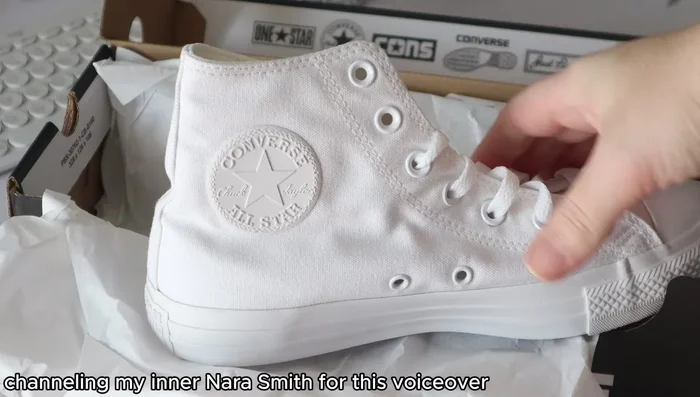
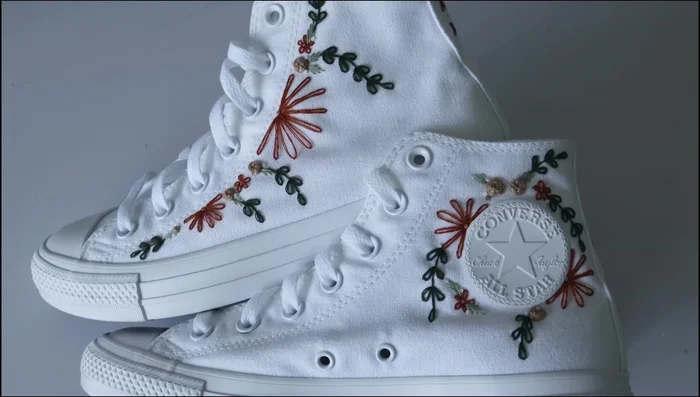
- White monochrome Converse high top shoes
- Always test your embroidery thread and techniques on a scrap fabric similar to your bridal shoe material before working on the shoes directly. This prevents potential damage or ruining the shoes.
- Use a needle and thread appropriate for the shoe material. Too thick a needle can puncture the material, while too thin a needle might break easily.
- Work slowly and carefully, especially on delicate areas of the shoe. If you make a mistake, it's often easier to undo a few stitches than to try to repair a large error.
Step-by-Step Instructions
Prepare the Shoes
- Unbox and prepare the shoes. Check for any marks or stains.
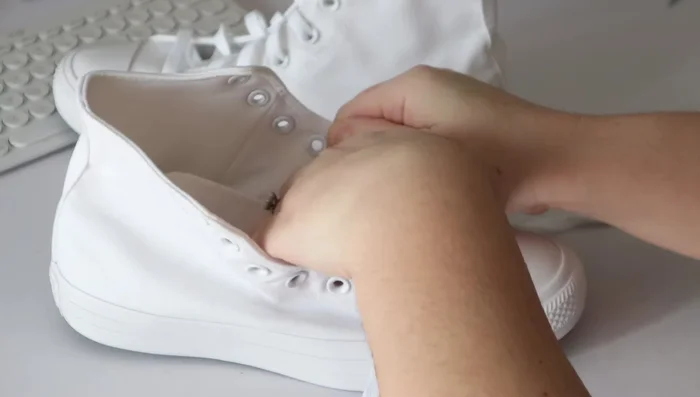
- Unlace the shoes completely and tuck the tongue underneath the toe cap.

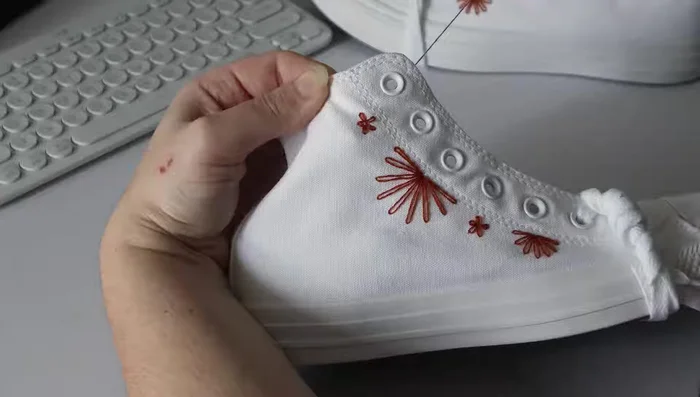
Prepare the Shoes Embroider Main Flowers
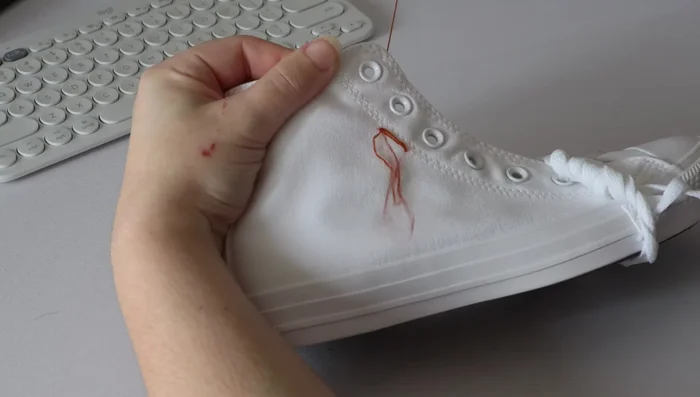
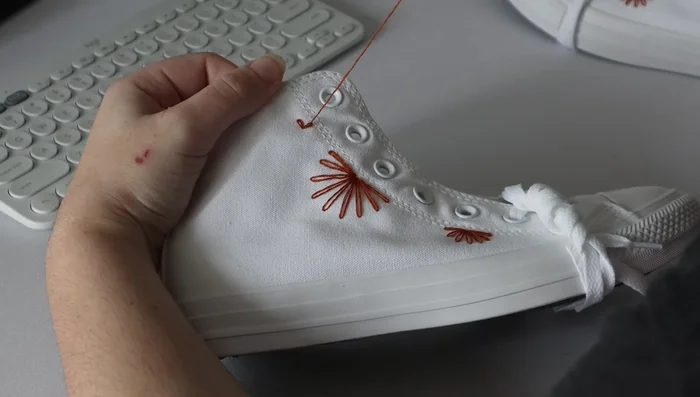
- Embroider the larger lazy daisy stitches for the main flowers (outside and inside).
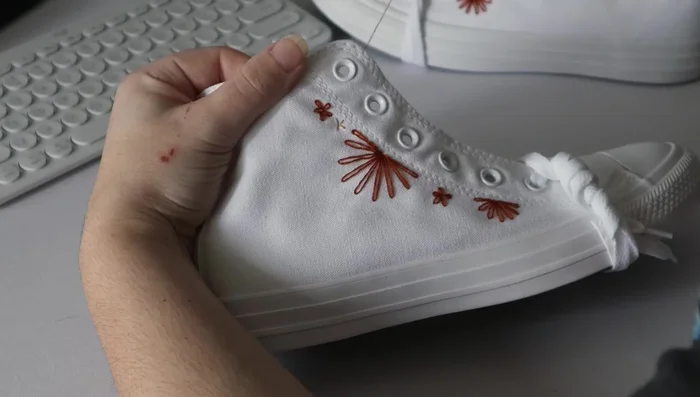
Embroider Main Flowers Embroider Accent Flowers
- Embroider smaller accent flowers using lazy daisy stitches.
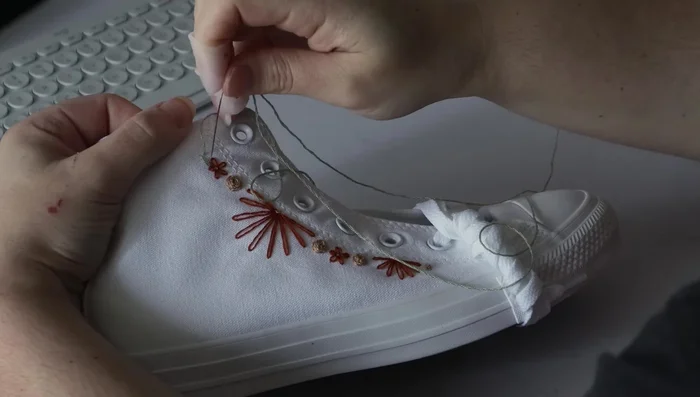
Embroider Accent Flowers Embroider Flower Centers
- Stitch the pollen of the flowers using French knots.
Embroider Flower Centers Embroider Roses
- Embroider roses using the woven wheel stitch.
Embroider Roses Embroider Leaves
- Stitch smaller leaves using straight stitches.
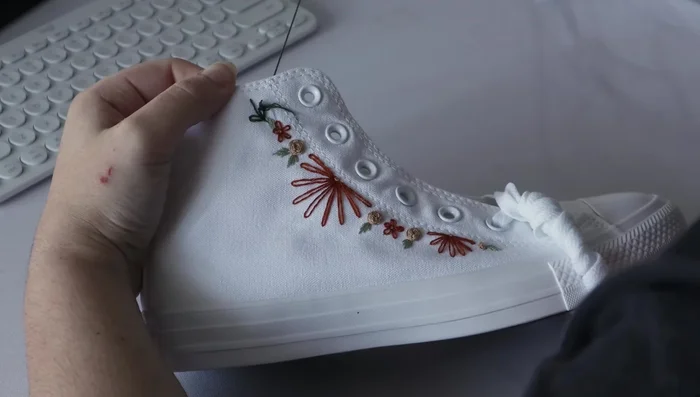
Embroider Leaves Embroider Vines
- Add vines using lazy daisy stitches.
Embroider Vines Embroider Small Accents
- Add small accents near the leaves using French knots.
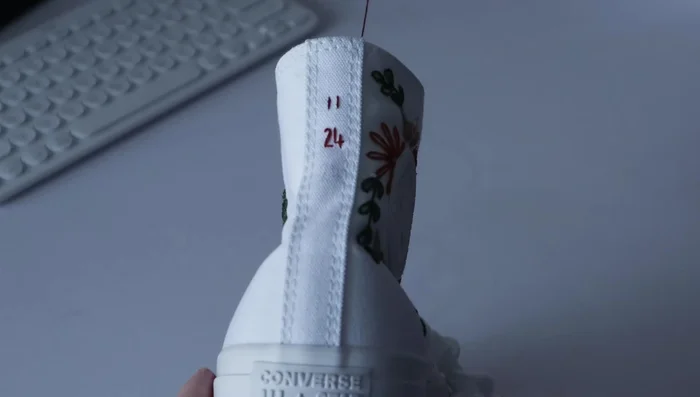
Embroider Small Accents Add Wedding Date
- Stitch the wedding date onto the back of the shoes using straight stitches.
Add Wedding Date Finish and Lace
- Lace up the shoes.
Finish and Lace

Read more: DIY Reversible Baby Slippers: Easy Sewing Tutorial
Tips
- Maintain the perfect tension on the thread for lazy daisy stitches to create a domed petal effect.
- Don't be afraid to go back and adjust the shape of lazy daisy stitches.
- Secure the thread by looping it through inner stitches before knotting.
- Keep tension on the thread when creating French knots.