Choosing the perfect finishing touch for a precious baby dress can feel overwhelming, but a beautifully crafted waist belt adds a touch of elegance and sophistication that's hard to resist. A custom-sewn belt allows you to perfectly match the fabric and style of your dress, creating a truly unique and charming outfit. Beyond aesthetics, a well-made belt provides a comfortable and secure fit, ensuring the dress stays put throughout the day's adventures. Forget flimsy, store-bought options that can easily pinch or fall apart; this guide empowers you to create a durable and delightful addition to your little one's wardrobe.
This step-by-step guide will walk you through the process of sewing a perfectly fitted baby dress belt, from choosing the right materials to securing the final stitch. We'll cover everything you need to know, from measuring accurately to creating a professional finish, so even beginners can confidently craft a beautiful and functional accessory. Let's get started!
Preparation and Safety Guidelines
- sewing machine
- needle
- thread
- measuring tape
- iron
- Always supervise young children around sewing projects and finished garments to prevent choking hazards from small parts or loose threads.
- Use only soft, non-irritating fabrics suitable for baby's delicate skin. Avoid embellishments that could scratch or snag.
- Ensure all seams are securely sewn and finished to prevent fraying and potential strangulation hazards.
Step-by-Step Instructions
Prepare the Belt
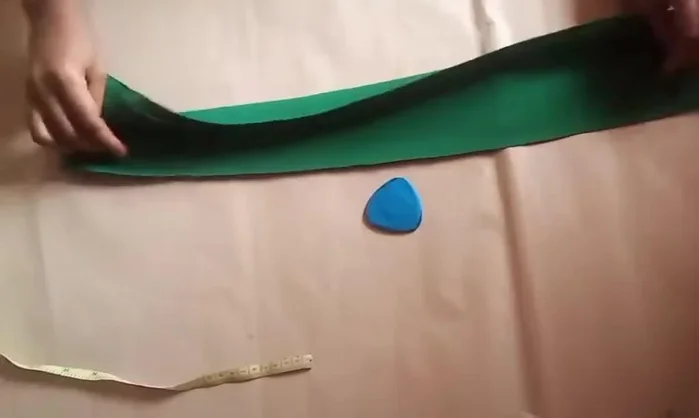
- Cut two rectangular pieces for the belt, each approximately 20 inches long and 1.5 inches wide (plus 0.5 inch seam allowance).
- Sew the two pieces together, leaving one short end open for turning.
- Turn the belt right side out, using a tool or your fingers to push out the corners.
- Press the belt flat.

Prepare the Belt - Ensure the seam of the belt is facing downwards.
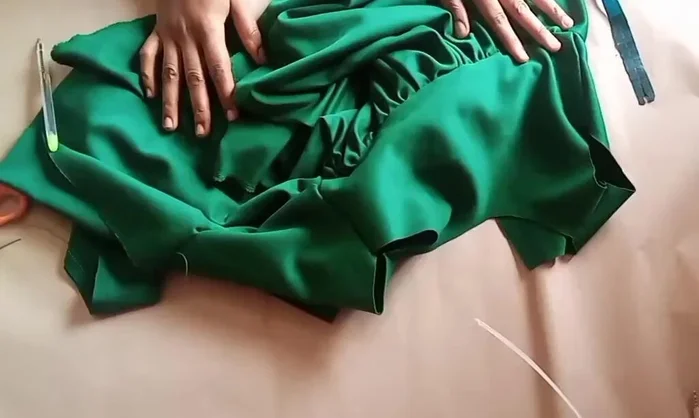
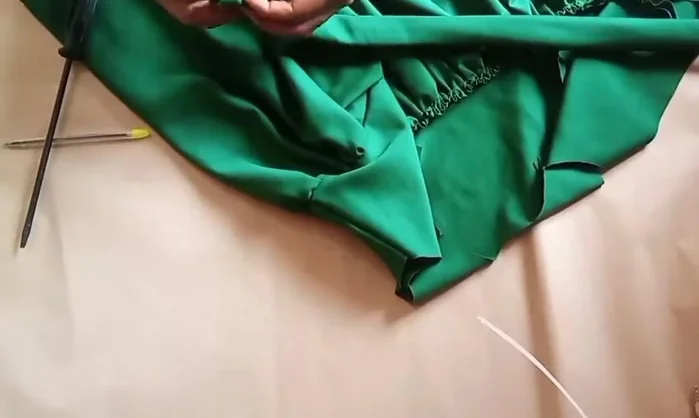
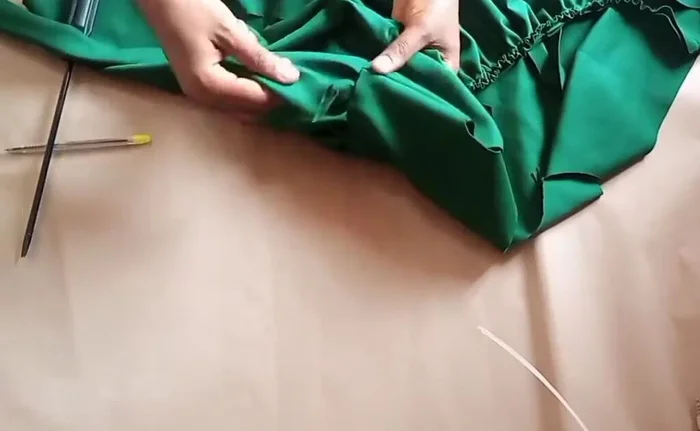
Prepare the Belt Insert and Attach the Belt
- Insert the belt into the previously prepared space on the dress (before joining the upper and lower pieces). The space should be 1.5 inches wide.
- Sew the belt in place, stitching along the seam allowance.
Insert and Attach the Belt

Read more: DIY Stretchy Fingerless Gloves: Easy Sewing Tutorial
Tips
- Insert the belt *before* joining the upper and lower parts of the dress for easier sewing.
- Use a method you're comfortable with to turn the belt right-side out.
- Press the belt well for a neat finish.
- Ensure the belt seam is facing downwards before inserting it into the dress.
- If using lining, it will conceal the belt's seams.